If you haven't already, check out Fidesic Workflow Pt 1 Here
Prerequisites
Before we can get started building out the workflow itself, we'll need to make sure we have the necessary data to start building.
-
Vendor Lists and Chart of Accounts Synced
- This can be done using Vendor Sync (Recommended)
- Using the Classic GP Vendor Sync
- Using the Flat File Method
-
Users Created In Fidesic
- This can be done using the Manage Users Page in Fidesic and adding directly
- Or you can send a spreadsheet into your onboarding specialists email and they will help create.
| Name | Role | |
| Joe AP | AP@fidesic.com | AP Admin |
-
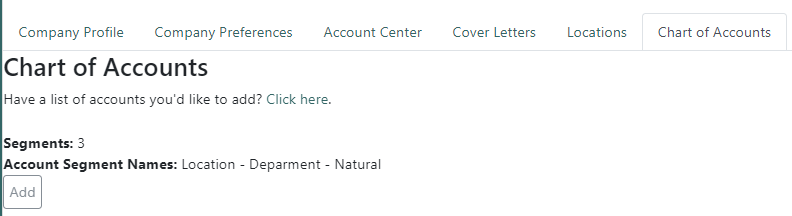
Add GL Segment Names to Fidesic
- Head to your company settings, and click on Chart of Accounts
- You can then Provide the Number of Segments and name each segment, this will allow us to refer to these segments in the Workflow Engine.
Workflow Rough Draft
We strongly encourage you to build out a workflow for invoices on a piece of paper or spreadsheet ahead of building in the actual workflow engine. There are going to be big changes in how you think about your invoice workflow as you build it, and having an easy to modify rough draft is the best option.
Initially, it's best to think about your workflow in general terms, and the types of rules and stages you will need.
Example: After AP Views the invoice, it needs to go to the department head for each location. Rather than thinking about all users out of the gate.
Types of supported Stages/rules:
- GL Segments
- Vendors
- Amounts
- The Person who submitted the invoice
Example rough draft
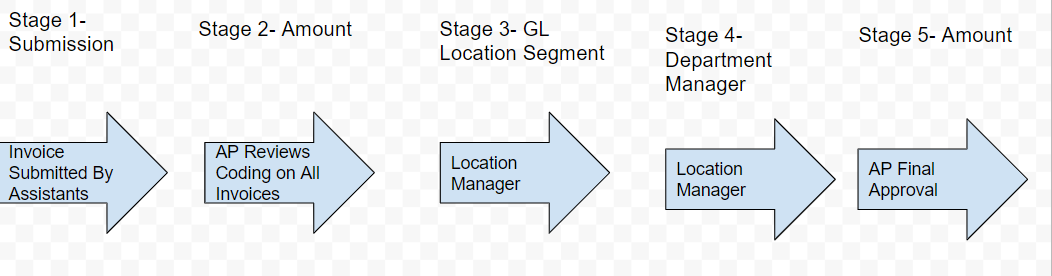
Once you have the basic flow of invoices mapped out, you can then begin to flesh out the details and see that things might get a little more complex.
To take your rough draft to the next step, you need to understand a couple of things about the Fidesic workflow. We'll Address these each in detail.
- Rules can be Directly Related/Dependent on the previous rule OR rules can be Independent.
- There is a rule for "Everything Else" you can add per stage called Unhandled to link things together
- Either/Or approvals are supported.
- Fidesic Rules support multiple "Matching" Values
Linking Rules Together (dependent rules vs independent rules)
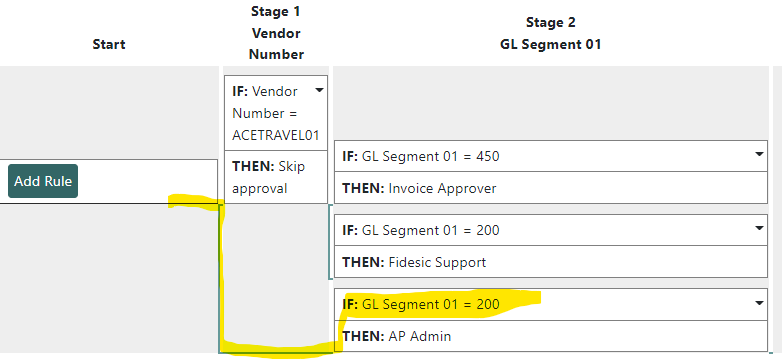
This example is designed to illustrate rules being linked together.

Any invoice submitted for ACETRAVEL01 will be caught by this top rule. From there, invoices will be sent to the following rules stage rules that are LINKED to the first rule.
In this case, and Invoice Coded to 450 will only be routed to the "invoice approver" user if it is also ACETRAVEL

Note: Adding a rule with "Skip Approval" is a great way to connect rules without adding additional approvers.
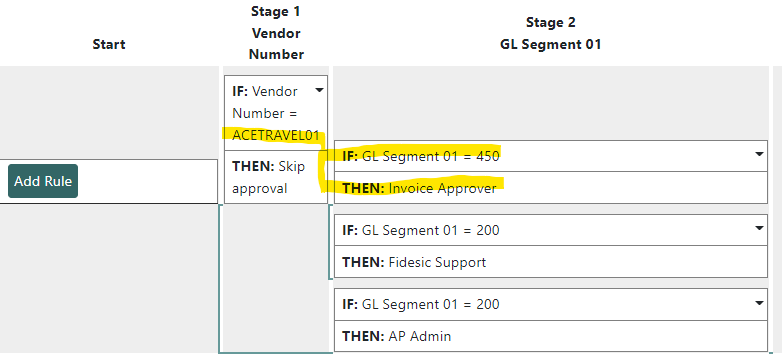
We would say these rules are linked, in that any other 450 invoices will not be routed because they do not meet the initially linked rule of Vendor = ACETRAVEL01
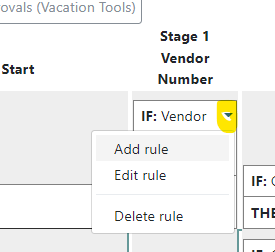
To Add a rule to an existing rule, you can do so by clicking the menu on the existing rule.
Invoices Coded to 200, however, will always be routed the AP Admin, independent of what vendor they are from. This is because this rule is tied to the start, instead of the previous rule.
 To Add a rule to the start of the workflow, click the Add Rule button at the start.
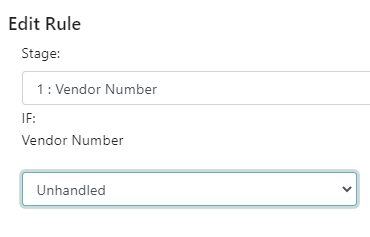
Using "Unhandled" as a way to connect things
Fidesic workflow has a built in "Unhandled" function that can allow you to build more complex workflows.
If you add an unhandled rule it is is saying "Everything else that isn't attached to another rule, follow along"
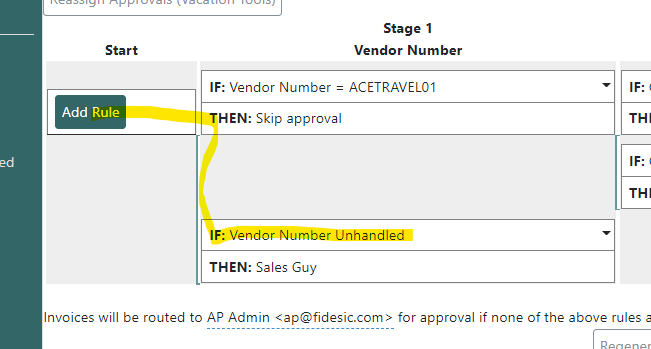
If we modify the previous example to have an unhandled rule, that means all invoices will route to this rule that were not used by the Vendor based routing. In this case anything that IS NOT ACETRAVEL01 will be routed to "Sales Guy"
Either/or rules
You can use the workflow rules to assign invoices to multiple people to make it a bit cleaner to do so, when adding a rule click the Add Additional Approver to Rule button.
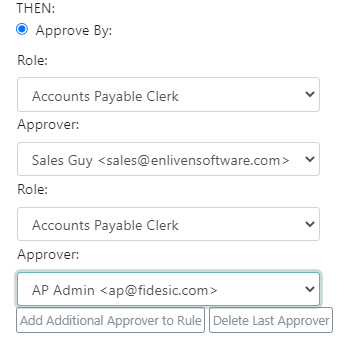
Whoever gets to this invoice first, will be the approver.
Using Multiple Values on a Rule
This is another method for greatly cleaning up the complexity of your workflow. If a user is in change of multiple GL Segment codes, you can add all codes to the value by separating with a semi-colon.

Workflow Final Draft
After you've mapped out your stages, and applied the above rules to how you think about your workflow, it is time to make a final draft.
At this point, those experience with the workflow can likely just start building using the Fidesic workflow interface. If you're not that experience, I recommend making one more hand drawn, or excel based workflow including the actual users and rules.