Fidesic Workflow University Part 1
This is the overview and intro to the Fidesic workflow for Accounts Payable Automation. If you're not sure where to start, begin here.
Intro
If you're reading this, you likely do not have a Fidesic workflow setup, or have never modified and existing workflow. This will help you frame how you think about workflow options, and hopefully make you feel comfortable with basic editing.
What the Fidesic Workflow?
The Fidesic workflow is a tool that allows you to assign invoices and payments to specific approvers. These assigned users will be required to review and approve an invoice before it can move forward in the workflow.
All invoices assigned to individual users will sit and await their approval, so it is very important to keep track of invoices that have been sitting inactive for a long time.
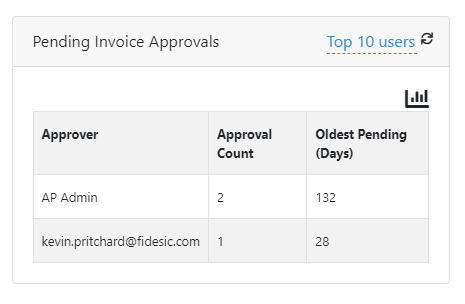
Your Fidesic dashboard will have a pane for both pending invoices and pending payments. This will sort based on the oldest pending approvals allowing you to see things that have been sitting in a particular approvers queue.
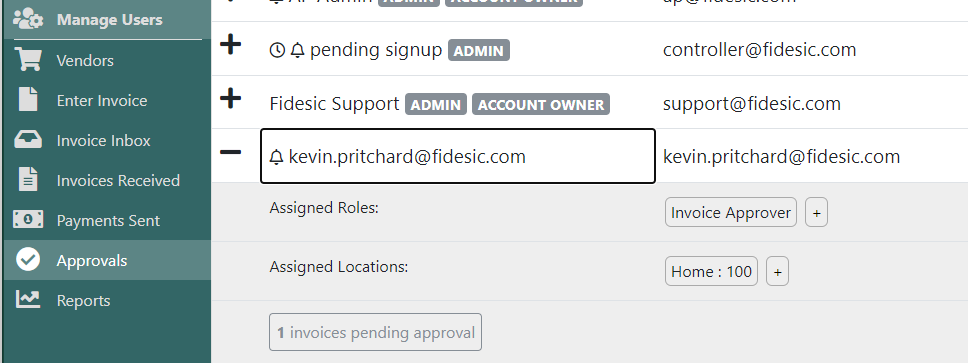
You can also see all pending approval by going to the Manage Users Page
Viewing and Modifying the Workflow
If you have the proper permissions for you user account you can view the workflow by navigating to The Settings and Workflow menu.
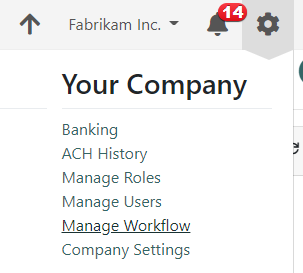
From the workflow page, you are able to add new rules, edit existing rules, and create stages.
The Fidesic Workflow is designed with discrete stages that relate to attributes on the invoices and payments.
Attributes you can use for workflow routing
- Amount
- Vendor Number
- Any active GL Segment
- Vendor Name
- Invoice Number
- PO Number
Individual Workflow Rules can be dependent on previous rules, or independent of previous rules.
Example Case:
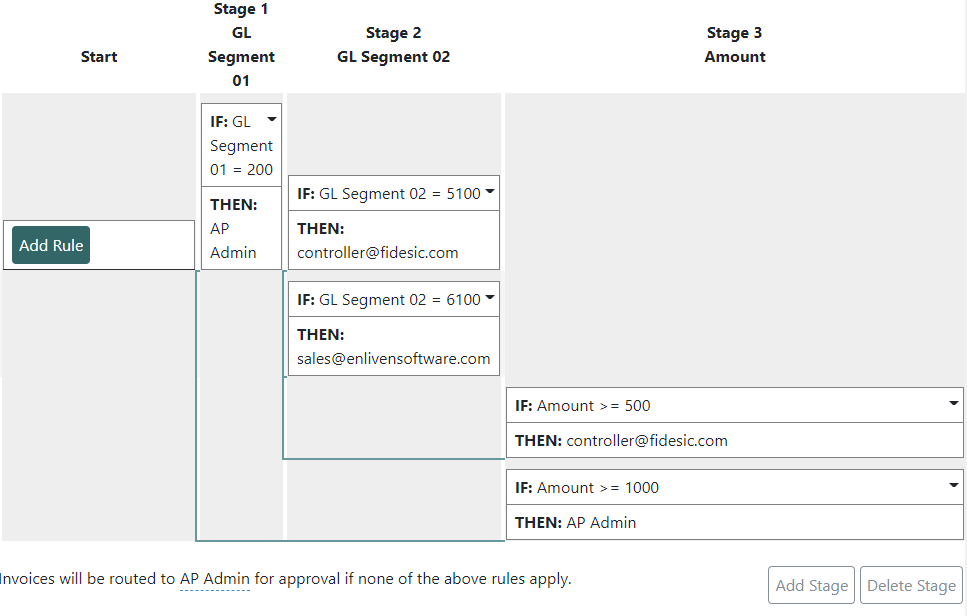
The GL Segment 2 Rules are dependent on the GL Segment 01 rules in the above example. Said another way, the GL Segment 02 = 5100 rule above will only effect invoices that also trigger the GL Segment 01 = 200 rule previously.
This is visually indicated on the workflow by the connecting lines.
The Amount >= 1000 Rule is NOT DEPENDENT on any previous rules as it's connected to the start of the workflow with the line visual indicator. That is to say, ALL INVOICES over $1000 will be routed using this rule independent of any other rules.
Adjusting Existing Rules
You can easily adjust existing rules in the workflow by clicking the Options >Edit Rule dropdown menu on individual rules.
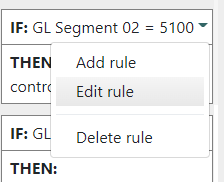
Once you have the edit prompt opened, you can adjust the individual parameters for approval, or the approver themselves.
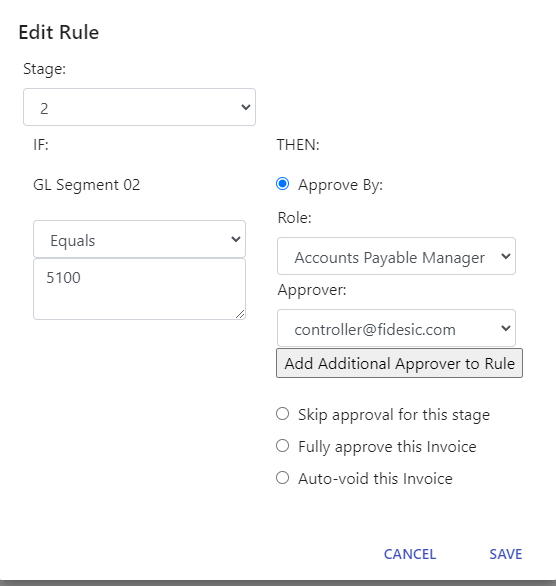
For simple 1 to 1 changes to users in the workflow, it is best to use the vacation tools built in on the users page.
For creation of workflow stages and rules, please see part 2 of this guide!