Company Profile Setup and Configuration
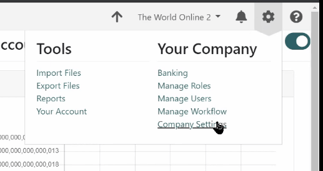
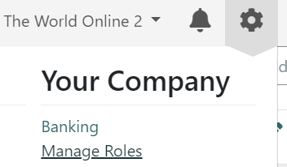
Click the Settings icon, and select Company Settings
From here you'll be on the Company Profile tab.
Click on the Edit button:
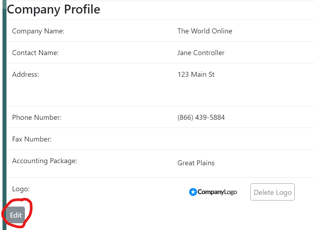
Please provide the following info (These fields are required for payment processing):
- Address 1
- City
- State
- ZIP
- Confirm Accounting Package
- Phone Number
You can also upload a custom logo using the Choose File prompt.
Company Preferences
The following are a list of preferences and what they control within Fidesic. If you have any questions about the exact details of a preference, it's best to leave it in it's default state and contact support for more info.
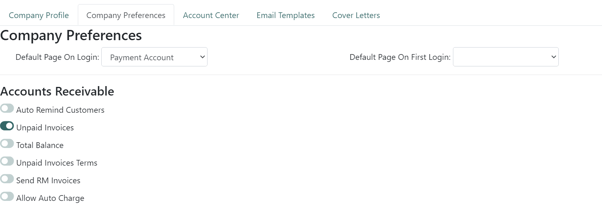
Auto Remind Customers
- This preference will automatically send your customers notifications when they have an invoice coming due. The timing of this notification can be configured on the Customer Card within GP under Fidesic Options.
Unpaid Invoices
- This preference displays the Unpaid Invoices tab from the Customer Account Center Portal.
Total Balance
- This preferences determines if the Total Balance Due is displayed to the customer within the Customer Account Center Portal.
Unpaid Invoice Terms
- This preferences determines if the customer is able to take advantage of specific discount terms within the Customer Account Center Portal.
Send RM Invoices
- If you do not use Sales Order Processing (SOP) for invoicing within GP, enable this preference.
Allow Auto Charge
- This Preference enables our Auto Charge feature. This allows customers to opt in to pay their bill automatically each month. The customer will receive a receipt of their payment automatically after it is processed.
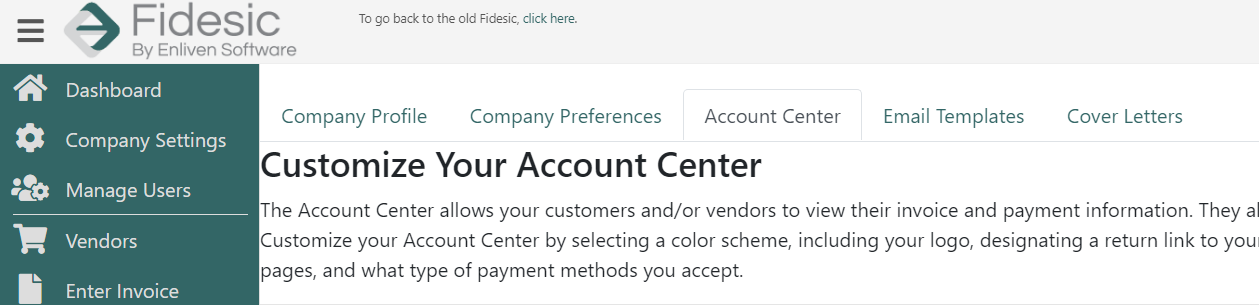
Customer Account Center Customization
From Fidesic, you'll be able to customize how your Customer Account Center looks to your customers, as well as set up a custom sub-domain to direct your customers to. To get to the account center, head to Company Settings and then click on Account Center.
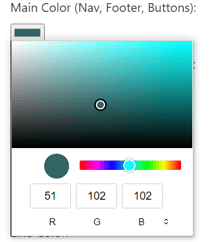
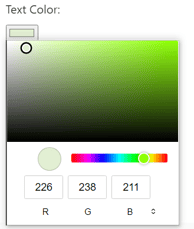
Color Scheme
From this section you will be able to set the main color and light text color within the Customer Account Center. The main color will effect the items that appear as teal/green while you are logged in, the Text color is the menu text color. It's best to choose complementary colors here for best results.
Logo
Upload the company logo that will be displayed on the Customer Account Center. It's best to use a transparent PNG.
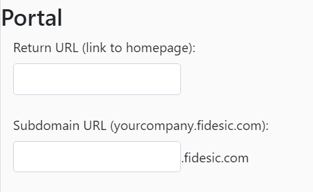
Portal and Subdomain
From this section you'll be able to set the return URL (where customers will be sent after logging out of the customer portal). The Subdomain URL (a static location where you can direct customers to login to the Customer Account Center).
Add Users and Roles
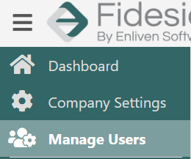
To get to the roles page, navigate to Settings and click Manage Users
From the Manage Roles Screen you have the ability to create groups for different levels of users within your organization. These roles can then be assigned to individual users. We've pre-loaded Fidesic with common base roles.

Clicking the plus sign to the right of the role name will expand the group and show you the details. You will also be able to edit a role's many permissions.
Manage Users
To add or manage users, head to Manage Users in the left navigation panel
To add a new user, click Add User at the bottom of the screen. We need a valid email address and assigned role to create a new user.
To manage users, click the user to view their details. You can add/remove roles or resend their signup email if they have not yet registered.
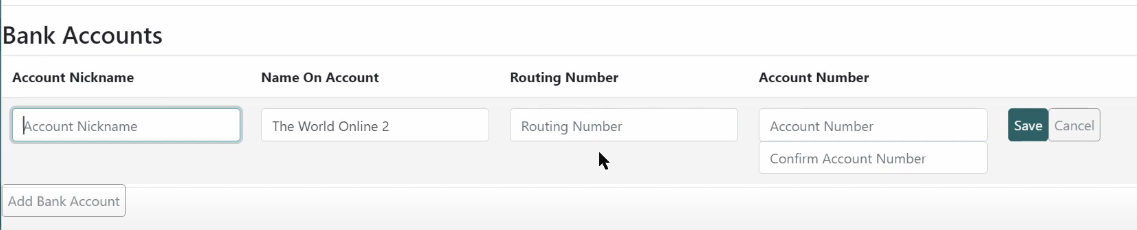
Add Banking Info
Before processing any payments (paper check or ACH) using Fidesic, you will need to enter bank account information. For this to function properly, this info must have a matching configuration on the CheckbookID within Dynamics GP.
To add banking info, head to the Settings menu, then select Banking.
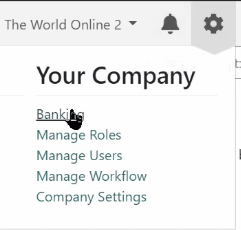
To add a bank account, you will need to enter all fields and then hit save. Note, Account Nickname must match bank id as it's set on the CheckbookID within Dynamics GP.
Customer Import
To get started, you will want to import a batch of customers from GP into Fidesic. These records will be automatically created and updated through regular usage, however for launch and initial balance info, we'll need a full customer list. To get to the customer import page, you'll go to Settings > Import Files.
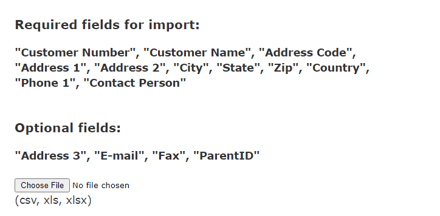
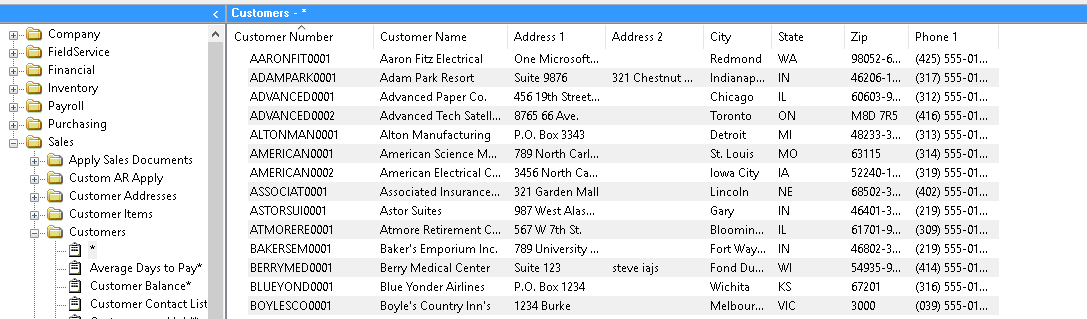
A SmartList report in GP can be used to generate this list:
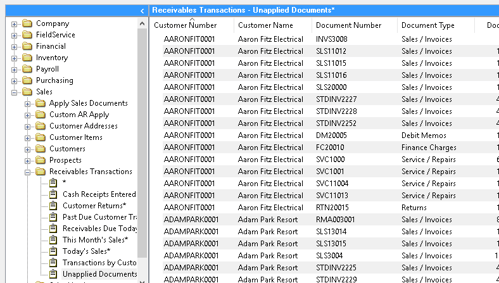
Open Items Import
This is also available under Import Files.
The GP Smartlist to use here is known as Unapplied Documents in GP. To get accurate info, make sure to Apply All transactions possible prior to running this report.
Setting Up a Merchant Account Fidesic for GP Module Installation
The Fidesic AR Module for GP will connect your GP system to Fidesic for all functions. Individual Instructions below:
Standard Fidesic Module Installation Instructions