Preparation
Fidesic's Dynamics GP Module is designed to be used in combination with enhanced scripts on your company database setup in SQL. For Info on how to initially set up Fidesic for MEM, click here.
You will also need access to view the Payables Batch Entry window in GP.
Also, if you'd prefer, we have a Video format overview.
https://www.youtube.com/watch?v=ZRbh5pEBayQ
Payables Batch Entry
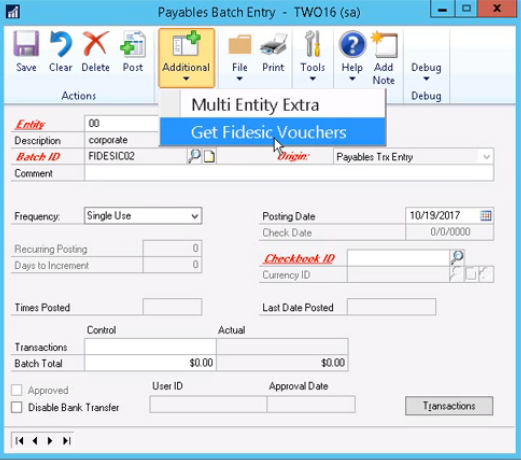
Open the payables batch entry window.
You'll need to pick a temporary entity ID on this window. This batch will act as a placeholder for importing transactions in your Fidesic batch into the correct entity batch in GP.
You'll also need to select a Batch ID and Origin .
Note: Do NOT re-use existing Batches for this process. This may result in MEM scripts not being properly applied. (This is no longer necessary on Fidesic GP Module Versions 18.5 or later)
After adding this info, select Get Fidesic Vouchers from the Additional menu in GP at the top of the window.
Fidesic Login and Import
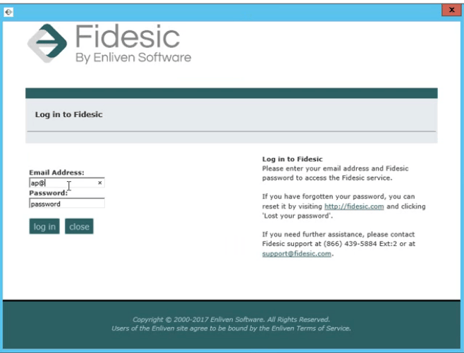
After selecting Get Fidesic Vouchers in the previous step a login window will pop up. You will log into this using your existing Fidesic email and password (this will be the same login you use to normally access the site).
After logging in you will see all invoices currently in approved status and ready to import into GP. You'll be able to manually select invoices if you need to segment batches for any reason.
After selecting the invoices you'd like to import, click Import.
Note: Invoices do not need to be segmented by entity ID. Fidesic will split invoices into the correct entity batch based on the GL coding within Fidesic.
Finding Fidesic Created Batches
After importing, Fidesic will split the invoices into their correct entity ID for probably GL entity coding.
The initial batch you created to initiate the import becomes a placeholder batch. Any transaction without a proper intercompany setup in MEM will be sent to this initial batch. All successfully processed transactions will be put into individual entity batches.
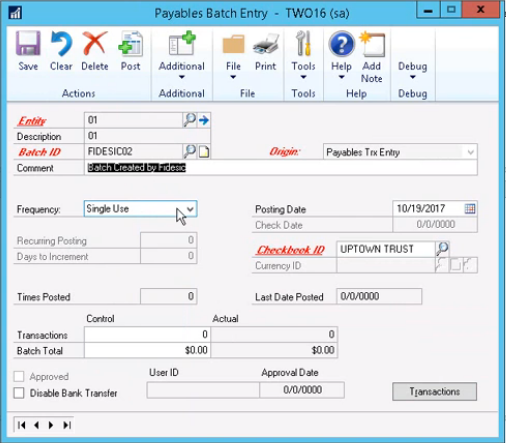
To find your other Fidesic Created batches, hit clear on the payables batch entry window, then lookup the batch ID. Fidesic will affix the Entity coding on the end of the batch name you created.
Ex. If you name a batch "Fidesic" and it's split into Entity "001", the batch name we create will be called "Fidesic001"
Imported transactions can be reviewed and posted as if they were manually created within GP.
If you're having any issues, make sure to check out the Fidesic MEM Troubleshooting documentation or contact Fidesic Support.