Our import process is designed to use the standard GP Batch Entry process. Most steps in this process will be familiar to a standard user of GP.
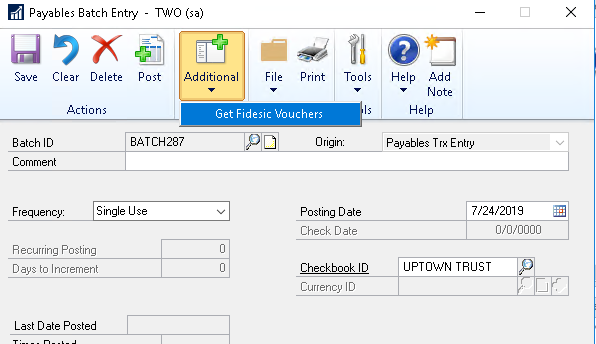
Payables Batch EntryTo get to this window navigate to the menu Transactions->Purchasing->Batches. This will open the Payables Batch Entry window.
Once in this window, you'll need to enter the following:
- BatchID- This can be anything unique
- Origin: Payables Trx Entry
After you've entered the required fields, click the Additional menu and select Get Fidesic Vouchers.
After selecting Get Fidesic Vouchers you'll have a window pop up that will ask you to log into Fidesic. This is the same login you usually use to access our site.

After selecting login you will be taken to a page with all currently approved invoices that are ready for import. These invoices will be automatically selected, but you will have the option to select or deselect individual invoices at this stage.
After selecting or deselecting the invoices you need, click the Import button at that bottom of this page.

After importing simply close this window. This will take you back to the Payables Batch Entry window you created earlier. This batch will now be populated with the invoices you selected at the previous stage.
To get more info on an invoice you can click the transaction button on this window. This will allow you to inspect the transaction in detail prior to posting.
By clicking the notes field on the transaction detail, you will be able to see the link to the PDF copy of the invoice. This will always be attached to the notes field.
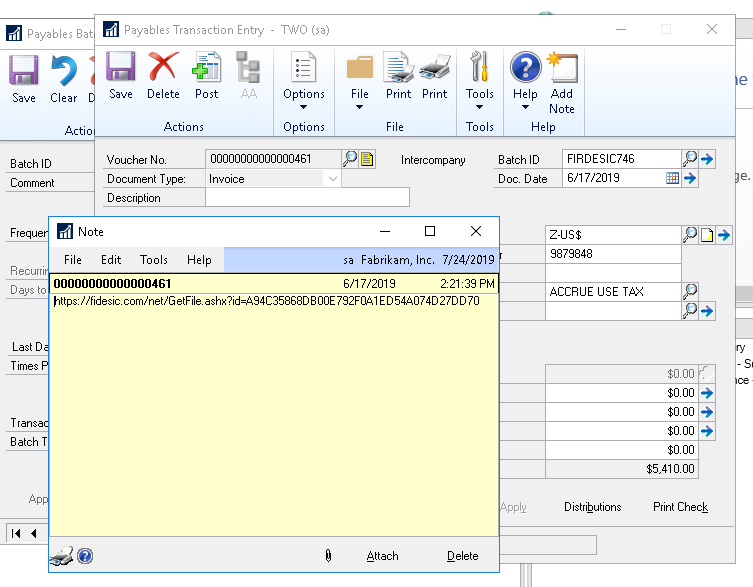
Inspecting the transactions is not necessary, but you can drill into as much detail as if you entered the transaction manually into GP.
When you are ready, you can post this batch as you would any manually created batch within GP.