Manage Roles
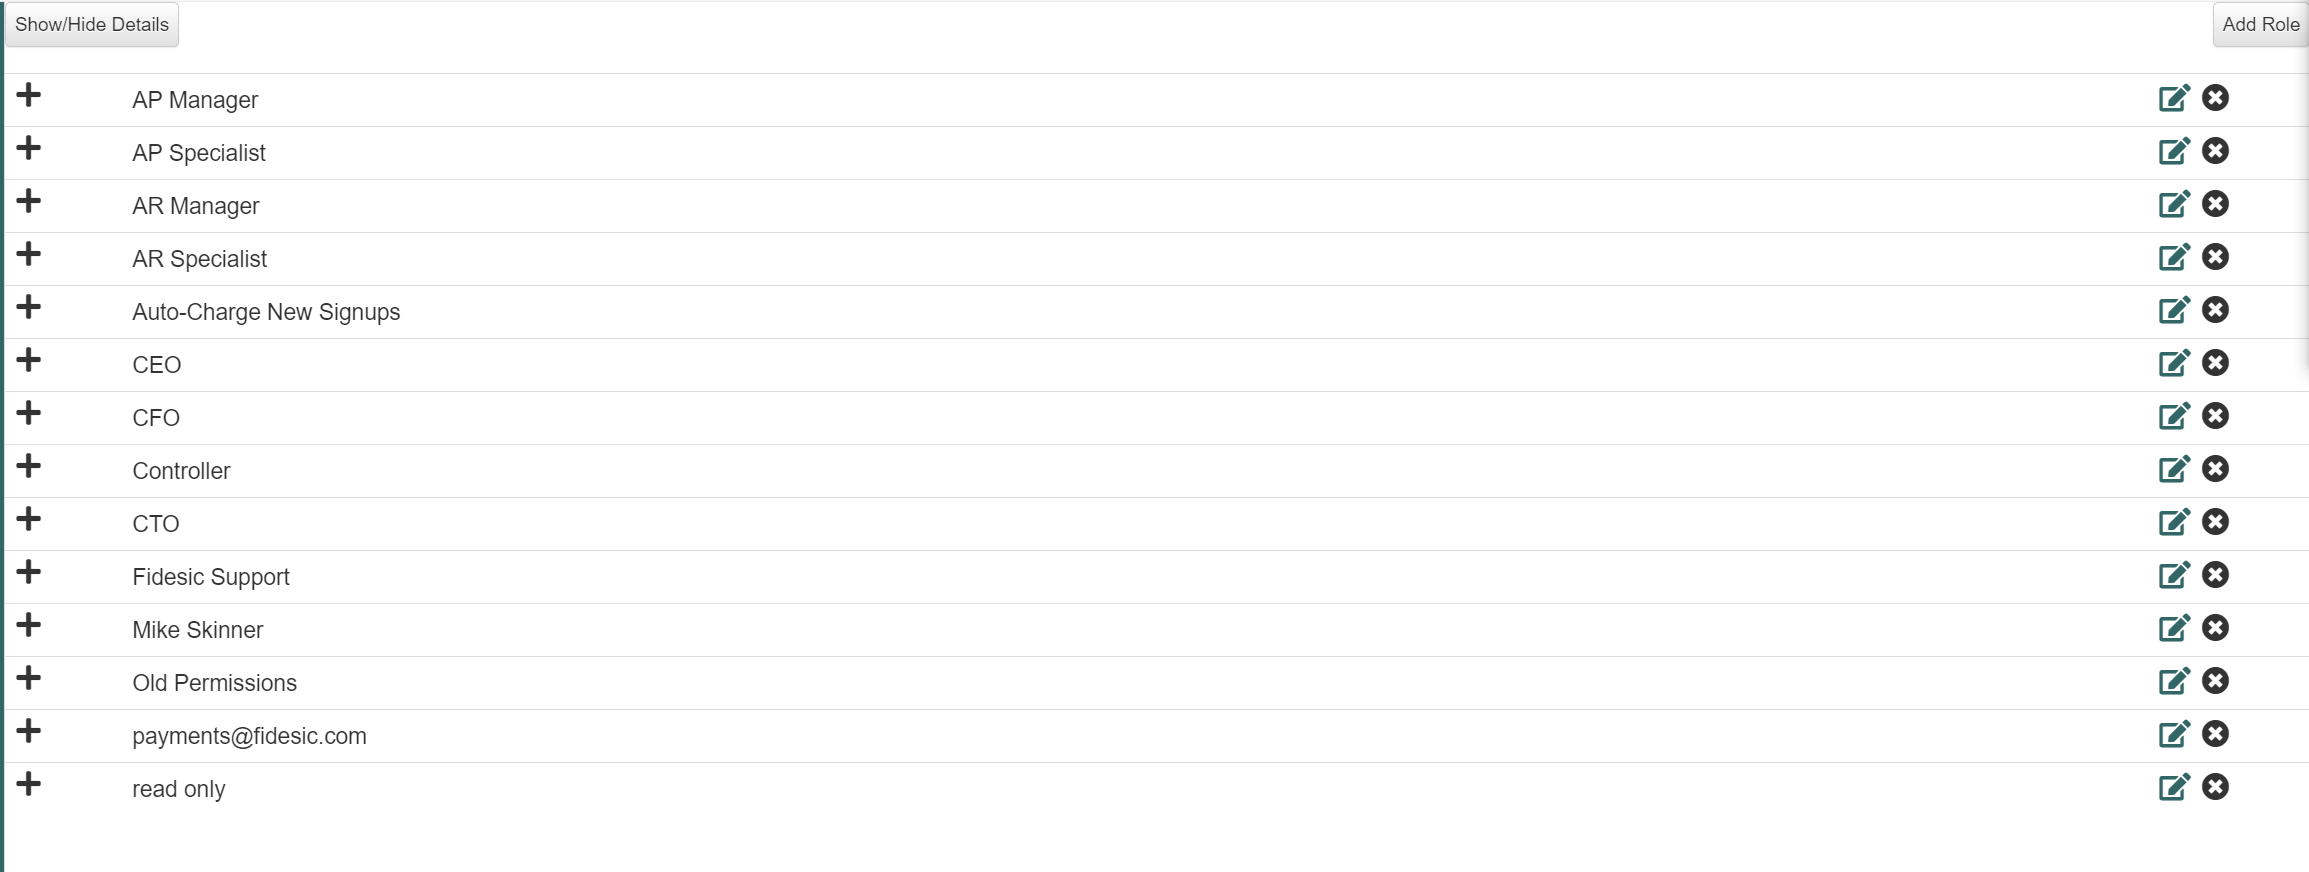
To navigate to the Manage Roles screen, click on the gear at the top right of your screen, then click on "Manage Roles".
From here, you have the ability to create groups for different levels of users within your organization.

Clicking on the row will expand the group and show you the details of what permissions are associated with each row.
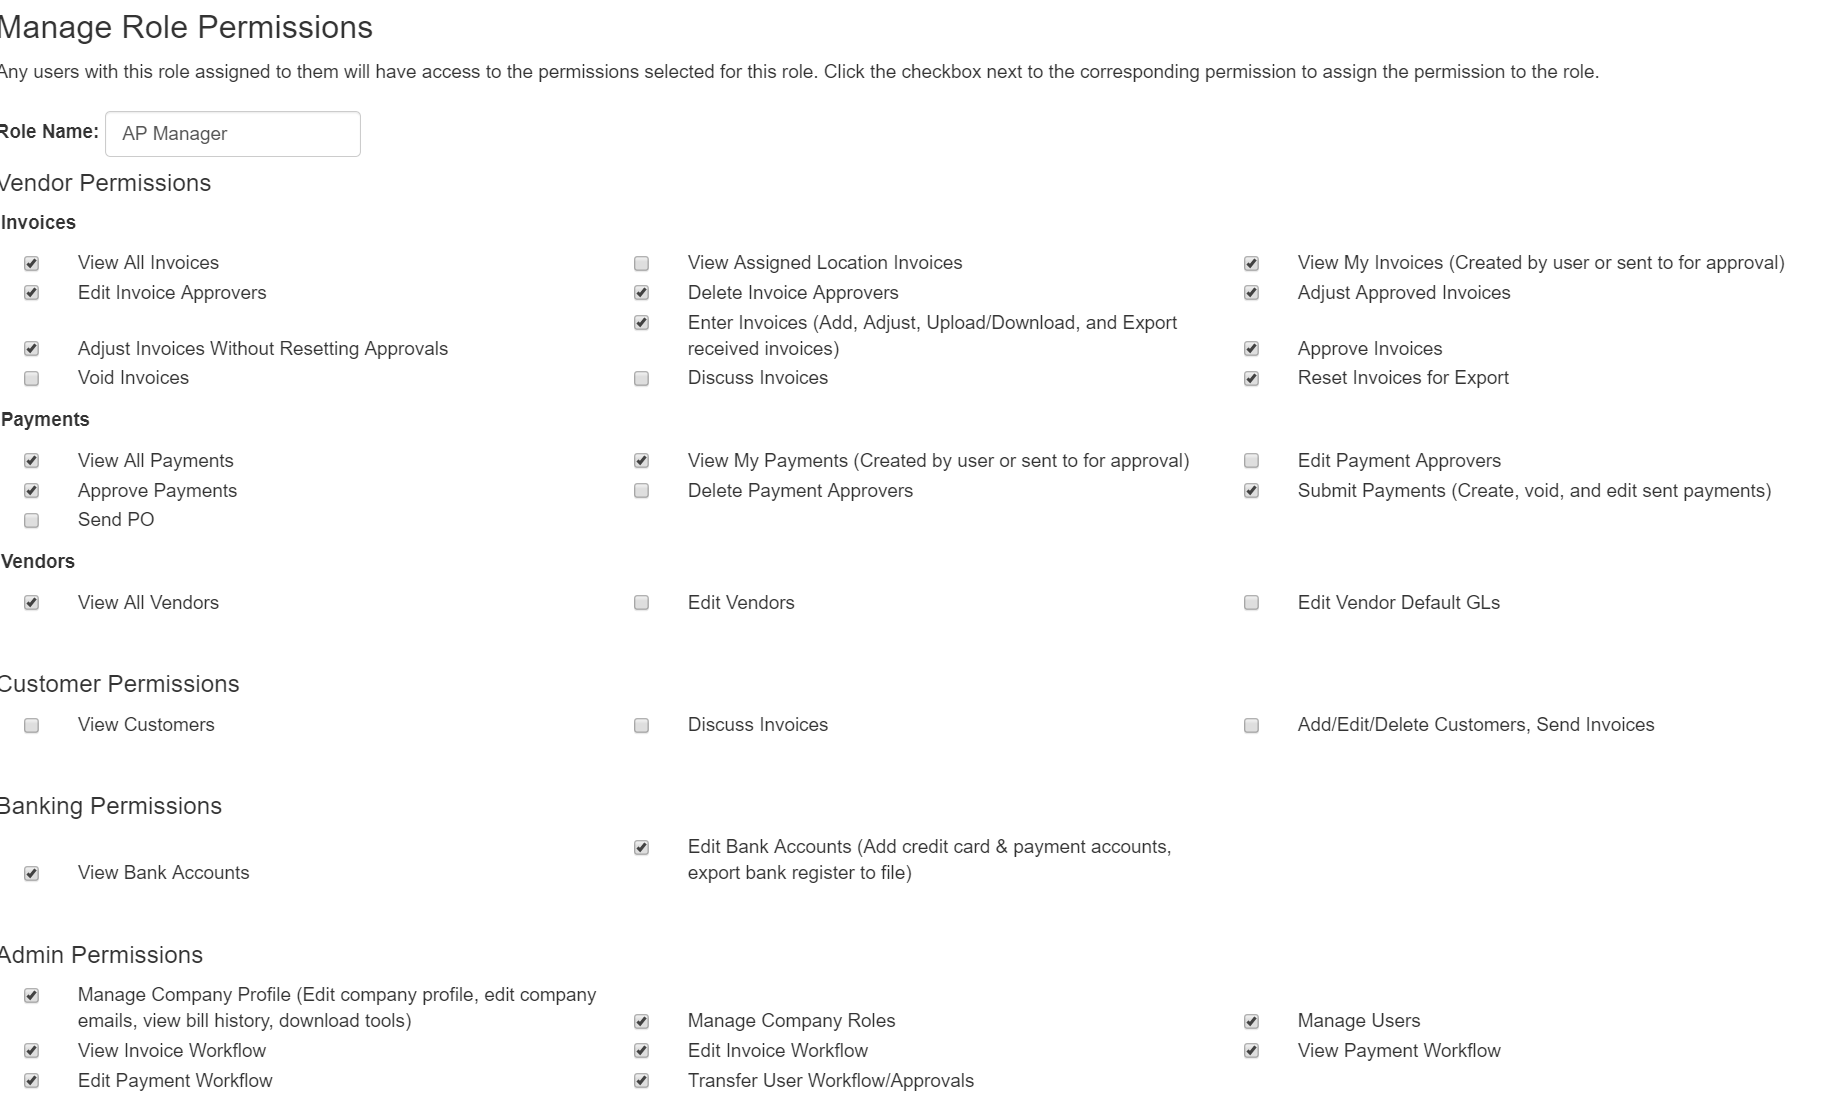
 Selecting the
  icon at the right of each row will allow you to edit that role's many permissions:
- Invoices
- Payments
- Vendors
- Customer permissions
- Banking Permissions
- Admin Permissions

Additionally, it will allow you to edit the notification settings for that role also under the Manage Role Email Settings.
