Part 1- Syncing GLs from BC to Fidesic
Dynamics 365 BC will act as the master record for all Vendor and GL information. That means this import will flow FROM BC to Fidesic.
You will need to pull an Excel or CSV formatted file from BC of all GL Codes. This can be done using smart connect to generate the necessary file.
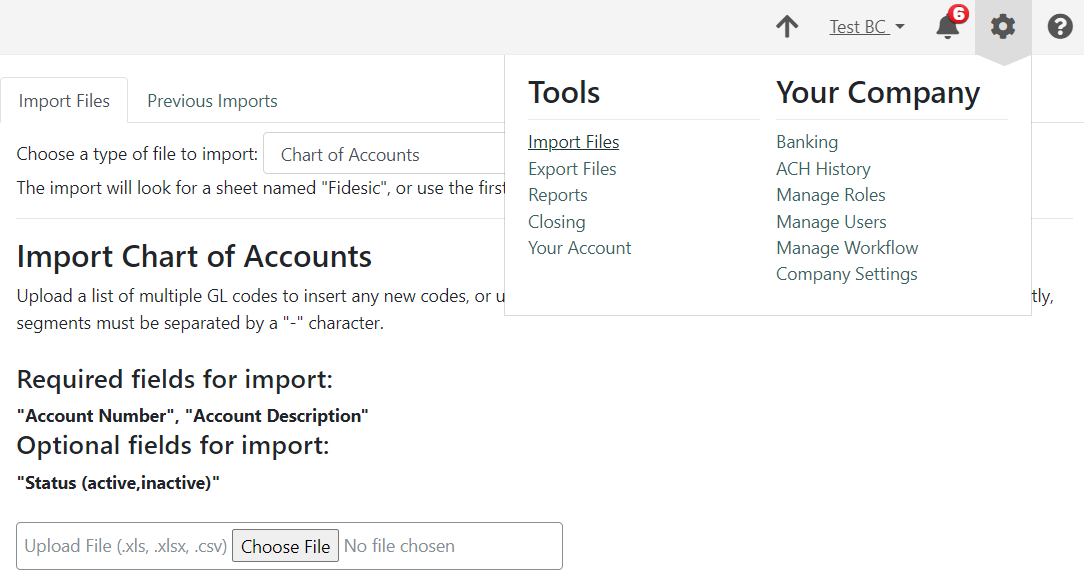
To Import this list into Fidesic, Navigate to the Import Files then select Chart of Accounts
Excel File Formatting
This file must contain column headers with the following names.
Required fields for import:
"Account Number", "Account Description"
Optional fields for import:
"Status (active,inactive)"
Part 2 - Syncing Departments
Follow the same steps above but select GL Departments
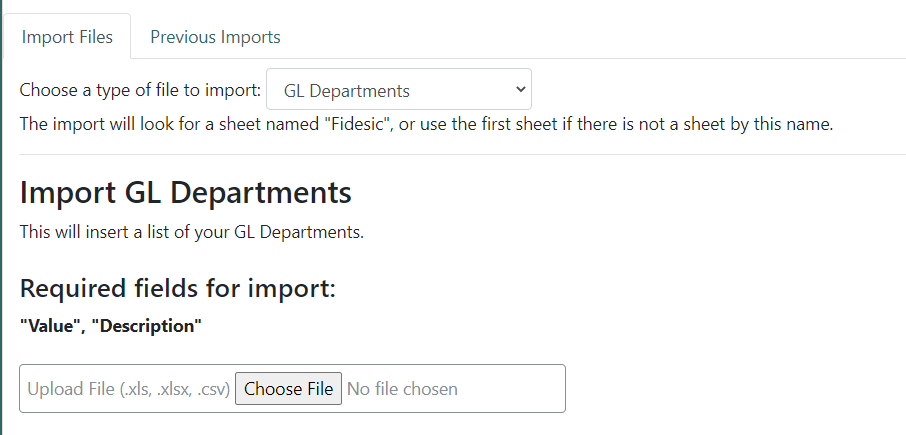
Required fields for import:
"Value", "Description"
Part 3 - Syncing Locations
Follow the same steps above but select Locations
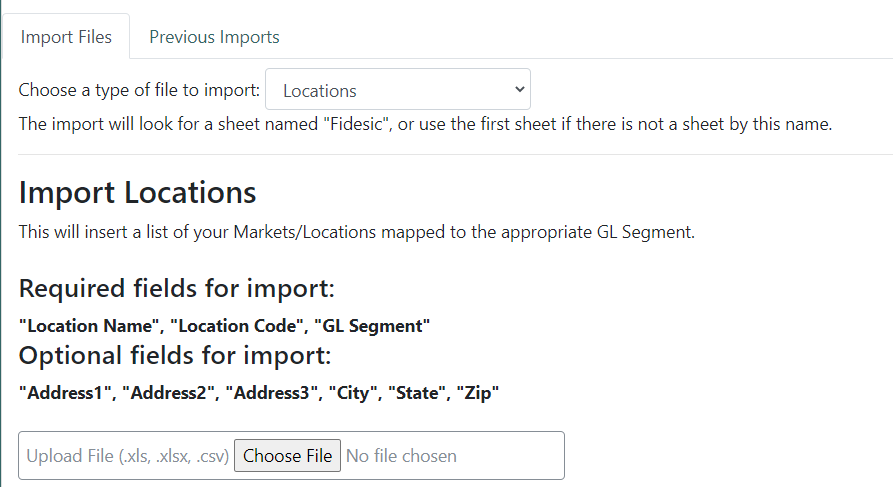
Required fields for import:
"Location Name", "Location Code", "GL Segment"
Optional fields for import:
"Address1", "Address2", "Address3", "City", "State", "Zip"
Part 4- Syncing Vendors from BC to Fidesic
Dynamics 365 BC will act as the master record for all Vendor and GL information. That means this import will flow FROM BC to Fidesic.
NOTE: If you do not upload GLs First, you can not set default GLs below.
You will need to pull an Excel or CSV formatted file from BC of all vendors. This can be done using smart connect to generate the necessary file.
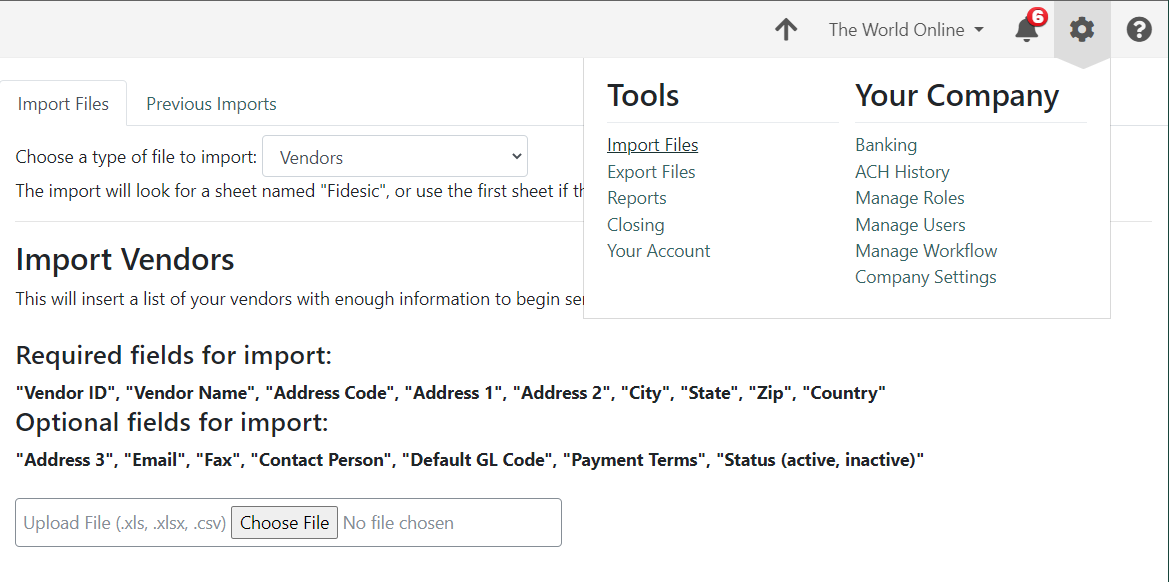
To Import this list into Fidesic, Navigate to the Import Files then select Vendors
Excel File Formatting
This file must contain column headers with the following names.
Required fields for import:
"Vendor ID", "Vendor Name", "Address Code", "Address 1", "Address 2", "City", "State", "Zip", "Country"
Optional fields for import:
"Address 3", "Email", "Fax", "Contact Person", "Default GL Code", "Payment Terms", "Status (active, inactive)"
Part 5- Syncing Invoices from Fidesic to BC
To sync approved invoices from Fidesic into BC, you can generate a flat file of all approved invoices in Fidesic. This will export to an excel file, and mark all invoices exported as exported (so they do not show up in the next export batch).
To do so, navigate to Export Files and select Invoices to Accounting
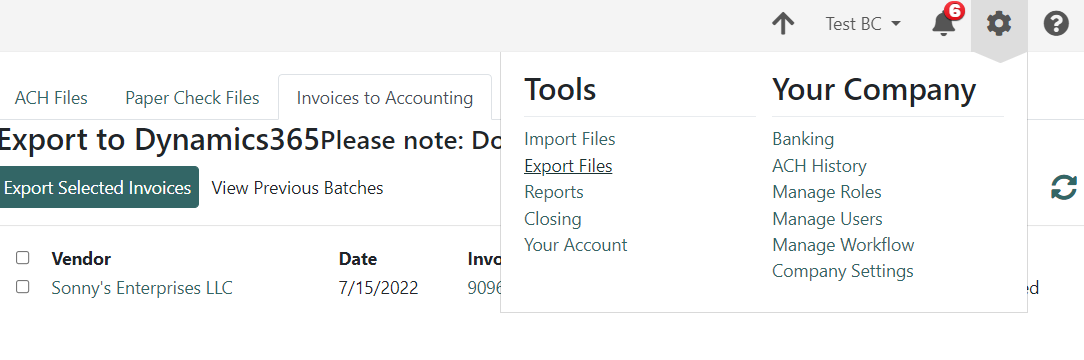
This will give you a list of all invoices in approved status. After selecting all invoices you'd like to include, you can hit the Export Selected Invoices button. This will generate an excel document with the required fields for integration into BC and mark all invoices as exported.
You can see previously exported batches by selecting the View Previous Batches button up top.