![fidesic-logo-300px-2023-2.png]](https://help.fidesic.com/hs-fs/hubfs/fidesic-logo-300px-2023-2.png?height=40&name=fidesic-logo-300px-2023-2.png)
Single sign-on lets your users sign in to Fidesic with their work account, through your company's identity provider. It works with Microsoft Entra ID (Azure AD), Google Workspace, Okta and any other provider that supports SAML 2.0. You can offer it as an option, or require it for everyone in your company.
Who can do this: account owners only. Setup also needs someone who can add an app in your identity provider, usually your IT team.
Users still need to be invited to Fidesic first. Single sign-on changes how they sign in, not who has access.
Adding single sign-on to your account
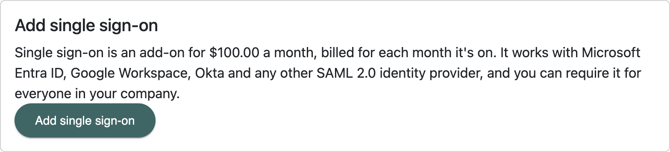
Single sign-on is a monthly add-on.
- Go to Settings → Users & Permissions → Single Sign-On.
- Click Add single sign-on. The card shows your price.
- Click Add to confirm. It's billed for each month it's on, starting this month.
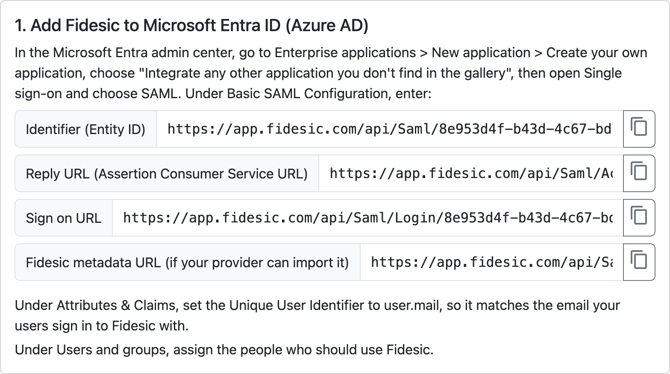
Step 1: Add Fidesic to your identity provider
Choose your provider under Your identity provider. The page then shows that provider's steps and uses its field names. Changing this choice only changes the instructions, not your settings.
In your provider, create a SAML app for Fidesic, then copy these values from the Fidesic page into it, using each row's copy button:
- The Entity ID. Entra calls it Identifier (Entity ID), and Okta calls it Audience URI (SP Entity ID).
- The Reply URL. Google calls it ACS URL, and Okta calls it Single sign-on URL.
- The sign-in URL, which is optional.
- If your provider can import it, the Fidesic metadata URL fills in the rest.
Your provider must send each user's email address, and it must match the email they sign in to Fidesic with. The page tells you where to set this for your provider:
- Microsoft Entra ID: under Attributes & Claims, set the Unique User Identifier to user.mail.
- Google Workspace: set Name ID format to EMAIL and Name ID to Basic Information → Primary email.
- Okta: set Name ID format to EmailAddress and Application username to Email.
Then assign the app to the people who should use Fidesic.
Step 2: Upload your provider's metadata
- Download the SAML metadata XML file from your provider. In Entra, it's the Federation Metadata XML under SAML Certificates. In Google, click Download Metadata. In Okta, open the Metadata URL on the app's Sign On tab and save the page as an XML file.
- On the Fidesic page, choose the file under card 2.
- Leave Email attribute (optional) blank to use the email your provider sends as the NameID. If your provider sends the email in a different attribute instead, enter that attribute's name.
- Click Save.
Once saved, the card shows your identity provider, its sign-in address and its signing certificate with its expiry date. When a certificate is within 30 days of expiring, the page warns Upload new metadata before it expires. Download fresh metadata from your provider and upload it here before that date, or single sign-on stops working.
Step 3: Test it, then turn it on
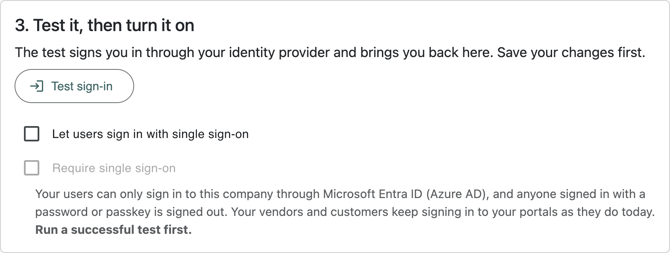
- Click Test sign-in. Fidesic sends you to your provider and back. The test has to be done by an account owner.
- When the test works, tick Let users sign in with single sign-on.
- To make it the only way in, also tick Require single sign-on. You can only tick it after a successful test with the settings you've saved.
- Click Save.
If you upload new metadata or change the email attribute later, Require single sign-on is unticked until you test again.
What users see
On the Fidesic sign-in page, users enter their email and click Sign in with single sign-on. They can also start from your provider, for example the app tile in Microsoft My Apps.
When single sign-on is required:
- Your users can only sign in to your company through your provider. Anyone signed in with a password or passkey is signed out.
- Your vendors and customers keep signing in to your portals with their passwords, as they do today.
- A user who signed in with single sign-on can't add or remove a passkey, change two-factor authentication or remove a trusted device. To make those changes, they sign in with their Fidesic password.
- Single sign-on only opens your company. A user who also belongs to another Fidesic company signs in again to open it.
Signing out of Fidesic doesn't sign the user out of your identity provider.
New users
Invite new users as usual. A new user who has never had a Fidesic login can accept the invite by signing in with single sign-on. Someone who already has a Fidesic login accepts the invite with their Fidesic password first, and can use single sign-on after that.
Removing single sign-on
Click Remove single sign-on on the Single Sign-On page, then Remove. It turns off right away and everyone signs in with a password again. Anyone who joined through single sign-on sets a password with Forgot password. The current month is still billed.
If a sign-in doesn't work
- "Your company's sign-in page didn't send your email address." The provider isn't sending the email. Check the email setting in Step 1, or the Email attribute in Step 2.
- "You signed in to your company, but you don't have a Fidesic user there yet." Invite the person to Fidesic first.
- "Single sign-on isn't set up for" an email. That email's company hasn't turned on single sign-on, or the user isn't in it. Sign in with a password.