![fidesic-logo-300px-2023-2.png]](https://help.fidesic.com/hs-fs/hubfs/fidesic-logo-300px-2023-2.png?height=40&name=fidesic-logo-300px-2023-2.png)
Your own settings in Fidesic live on the Manage Account page: your name and phone number, the email you log in with, your signature for checks, which notifications you get, and whether Fidesic shows in light or dark mode. Everything here applies to your login only. Nothing you change on this page affects anyone else in your company.
Opening Manage Account
- Click your company name, with the person icon, at the top right of any page.
- Click Manage Account.
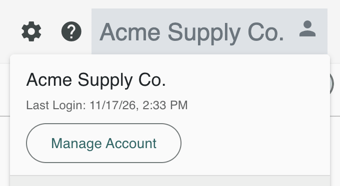
The menu also shows when you last logged in, and lists the other companies you can switch to.
Your name, phone number and login email
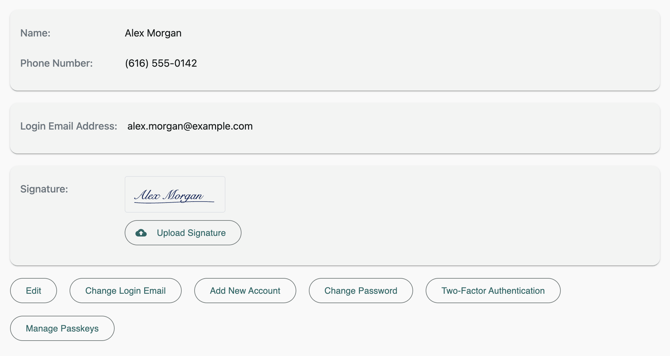
- Edit changes your Name and Phone Number, with an Extension if you have one. For an international number, include the country code. Click Save. Your name is what other users see, for example on approvals and in invoice discussions.
- Change Login Email changes the email address you log in with. Enter the new address, confirm your current password, and click Save. From then on, log in with the new address.
- Add New Account is for when another company also sends you invoices through Fidesic. It adds that account to your login, so you can switch between them from the account menu.
Password, two-factor authentication and passkeys
The buttons under your details take you to the pages that keep your login secure:
- Change Password asks for your Current Password and a New Password, and lets you set a Secret Question and Secret Answer. See Password requirements for your Fidesic login for what a new password needs. If you can't log in at all, see How to reset your Fidesic password.
- Two-Factor Authentication adds a code from an authenticator app to your login. The steps are in How to enable two-factor authentication (2FA).
- Manage Passkeys lets you sign in without a password or code, using your device's fingerprint, face recognition or screen lock. Click Add a Passkey and follow your browser's prompts. Passkeys need a recent version of Chrome, Safari or Edge.
Your signature for checks
If your company prints the approving user's signature on checks, the person who approves a payment needs a signature on file. The Signature section shows the signature Fidesic has for you, and Upload Signature replaces it. Use a PNG, JPEG, GIF or BMP image. A PNG with a transparent background and little space around the signature prints best.
You see the Signature section only when both of these are true:
- Your company has Print the Payment Approver's Signature on Checks turned on, under Settings → Company → Preferences.
- Your role has the Edit Payment Workflow permission.
If you approve payments but don't have that permission, ask an admin to upload your signature for you. They do that from your user card in Settings → Users & Permissions → Users, as described in Add signature file for an approver.
Use a generated signature for checks
When Fidesic prints and mails your company's checks, a Use a generated signature for checks switch appears under User Preferences. Turn it on and, if you have no signature image on file, checks you approve carry a signature Fidesic generates from your name. A signature image you've uploaded is always used first.
If you approve a payment with neither a signature image nor the generated signature, Fidesic asks you to Upload Signature File or Enable Generated Signature before the approval goes through. Without one of them, the check can't be printed.
User Preferences
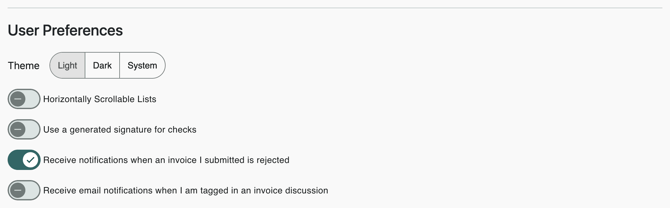
Each switch saves as soon as you change it.
| Setting | What it does |
|---|---|
| Theme | Light or Dark sets how Fidesic looks. System follows your computer or phone's own light or dark setting, and changes when it does. |
| Horizontally Scrollable Lists | On wide lists such as Invoices Received, shows long values in full and lets the list scroll sideways, instead of cutting them short to fit your screen. |
| Use a generated signature for checks | Signs checks you approve with a signature generated from your name when you have no signature image on file. Shown only when Fidesic prints and mails your checks. See above. |
| Receive notifications when an invoice I submitted is rejected | When an invoice sent in from your email address is rejected from the invoice inbox, you get a notification under the bell and an email, with the file name and the reason it was rejected. Not when you rejected it yourself. Off until you turn it on. |
| Receive email notifications when I am tagged in an invoice discussion | You always get a notification under the bell when someone tags you in an invoice's discussion. Turn this on to get an email as well. Off until you turn it on. |
About the theme
The theme is saved in your browser, not on your login. On another computer or browser, Fidesic starts on System until you choose there too. You can also switch between light and dark from anywhere in Fidesic by typing g, d, m. That shortcut always picks Light or Dark, so come back to Manage Account to return to System.
Other emails and daily summaries
Most of the emails Fidesic sends you aren't set on this page. Your role decides them, so everyone with the same role gets the same ones:
- emails when an invoice arrives, a payment is made or a payment file is ready
- daily summaries of invoice, payment and MagiCapture activity, and approval reminders
- when approval requests arrive: immediately, hourly, daily or twice daily
To change these, ask an admin to edit your role. See Manage Roles.
Vendor and customer logins in an Account Center see a different version of this page, with notification email addresses instead of these settings. See Manage Your Customer Account Center Account.